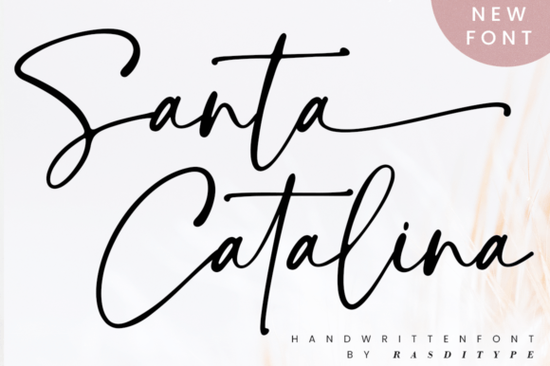
Finding the right script typeface often means balancing readability with a personal touch. The Santa Catalina Font is a handwritten style designed specifically for creators who need a distinct, timeless look without sacrificing legibility. Whether you are designing wedding invitations, setting up a photography watermark, or creating logos for a small business, this typeface offers a natural flow that mimics real penmanship. It gives your projects a custom, handcrafted feel right out of the box.
What makes this handwritten style work for commercial projects?
When small businesses and print-on-demand sellers choose a script, they usually look for two things: character and clarity. Santa Catalina provides a slightly textured, organic stroke that feels authentic rather than digitally rigid. This makes it highly effective for product packaging, boutique branding, and apparel graphics. Because the letterforms are carefully spaced, the text remains easy to read even when scaled down for tags or labels. When printing on items like ceramic mugs or canvas tote bags, the organic stroke weight ensures the ink lays down evenly without filling in the smaller loops. Crafters using cutting machines will also appreciate the clean connections between letters, which helps prevent tearing when cutting vinyl or cardstock.
How do you access all the extra swashes and alternates?
One of the most frustrating parts of using decorative typefaces is hiding extra characters behind complex software menus. This font is PUA encoded. In simple terms, this means every single glyph, swash, and alternate character is mapped to a standard keyboard stroke. You do not need expensive design software to find them. If you are using basic tools like Cricut Design Space, Silhouette Studio, or even standard word processors, you can easily open the character map and copy-paste the exact flourishes you want. On a Mac, you can use the built-in Font Book or Character Viewer, while Windows users can simply open the Character Map app from the start menu. This saves a lot of time when you are trying to customize a specific letter at the end of a word.
What types of designs benefit most from this specific script?
While it is versatile, this particular lettering style shines in projects that require a warm, inviting aesthetic. Here are a few ways creators are using it:
- Wedding and Event Stationery: The elegant flow is perfect for invitations, save-the-dates, and seating charts.
- Photography Watermarks: It adds a professional yet personal signature to portrait and event photos without distracting from the image.
- Modern Websites and Blogs: Using it for headers or quotes breaks up standard web text and adds visual interest.
If you are working on a project that needs a softer, more colorful aesthetic, you might also want to explore a gentle pastel-themed script to see how different color palettes change the mood. For those designing materials for younger audiences, looking at a playful school-style typeface can provide a fun contrast to more formal handwriting.
How should you pair this script with other typefaces?
Good typography relies on contrast. Since Santa Catalina has a lot of personality and fluid movement, it pairs best with clean, simple sans-serif or classic serif fonts. Let the script handle the main headlines or names, and use a basic, highly legible font for the body text, dates, or addresses. Always establish a clear visual hierarchy. The handwritten elements should draw the eye first, guiding the reader naturally into the simpler, supporting text.
If you want to experiment with different vibes, try mixing it with an aligned, structured script to create a layered text effect. Alternatively, if your design needs a bit more movement and energy, combining it with a retro swing-style lettering can give your layout a dynamic, vintage feel. For a highly decorative, scattered look, you might test it alongside an organic scatter-style typeface to see which one fits your specific layout better.
What should you check before finalizing your design?
Before you send your file to the printer or export it for the web, run through this quick checklist to ensure your lettering looks its best:
- Check the connections: Zoom in to make sure the connecting strokes between letters are smooth and not overlapping awkwardly.
- Test the scale: Print a test page or view the design at actual size to confirm the swashes are not too thick or too thin.
- Review the kerning: Even with well-spaced fonts, manually adjust the space between capital letters and the following lowercase letters if they look too cramped.
- Verify the background contrast: Ensure the delicate strokes of the script stand out clearly against your chosen background color or texture.
Taking a few extra minutes to review these details will keep your final products looking polished and professional.
Learn More Crafting with Baby Boho Font Style & Projects
 Victory Swing: Retro Design Font Inspiration & Uses
 Crafting Friendly Fonts for Young Readers
 Craft Your Vision with Handmade Fonts
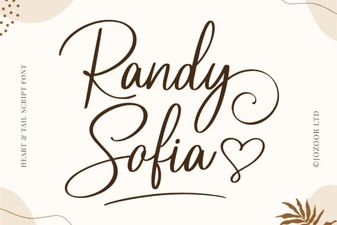 Randy Sofia Font: Creative Uses & Tips
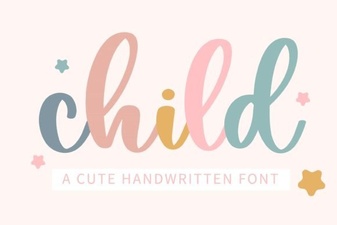 Choosing Child-Friendly Fonts for Creative Projects