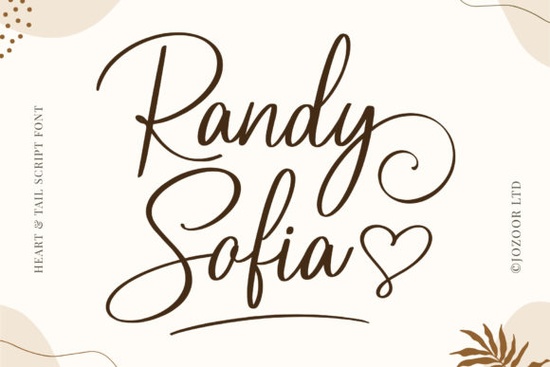
Finding the right handwriting style for a wedding invitation or a boutique logo can take hours of scrolling through endless options. If you need something that feels personal and elegant, the Randy Sofia Font is a great choice to consider. It is a sweet, romantic calligraphy typeface where the letters gently bounce along the baseline. This slight variation in height gives it a natural, hand-lettered look rather than a stiff, typed appearance. Whether you are a small business owner making product labels or a crafter designing custom greeting cards, this style brings a soft, luxurious feel to your work.
What makes this calligraphy style stand out?
The most noticeable feature of this typeface is the dancing baseline. In traditional typography, letters sit perfectly flat on an invisible line. Here, the characters dip and rise slightly, which mimics the natural movement of a human hand holding a brush pen or nib. This creates a relaxed, organic rhythm that is perfect for romantic designs.
The overall mood is very sweet and approachable. It avoids the overly dramatic, thick-and-thin contrast of some modern calligraphy, making it highly legible even at smaller sizes. This legibility is crucial when you are printing text on items like custom candles, cosmetic jars, or wedding favor tags where space is limited.
How do I access the extra glyphs and ligatures?
One of the biggest frustrations for crafters is buying a beautiful font only to realize the fancy swashes and connected letters are locked behind expensive design software. This typeface solves that problem because it is PUA encoded.
PUA stands for Private Use Area. In simple terms, it means all the alternate characters, swashes, and ligatures are mapped to standard keyboard slots. If you are using basic, free, or craft-specific software like Silhouette Studio, Cricut Design Space, or Canva, you do not need to know complex keyboard shortcuts. You can simply open your computer’s built-in character map, copy the extra glyphs you like, and paste them directly into your design.
Which projects work best with romantic script fonts?
Because of its elegant and soft aesthetic, this lettering style shines in projects that require a personal, human touch. Here are a few ways designers and crafters use it:
- Wedding Stationery: Perfect for invitations, save-the-dates, and seating charts where a romantic tone is essential.
- Print-on-Demand Apparel: Looks great on tote bags, sweatshirts, and mugs, especially when paired with simple line-art graphics.
- Boutique Branding: Ideal for small businesses in the beauty, floral, or handmade jewelry niches that want a luxurious but approachable logo.
- Custom Gifts: Excellent for engraving or vinyl decal projects on cutting boards, wine glasses, and wooden signs.
If you are working on a more playful kids' product, you might want to look at a friendlier, school-style lettering option instead. For floral branding, pairing your main text with a botanical-inspired duo can create a beautiful, cohesive look. When designing Valentine's Day merchandise, combining it with an affectionate, love-themed typeface works wonderfully for secondary text. If you prefer a slightly more traditional, elegant flow for your headers, checking out a classic signature style might give you more ideas. You can also browse the rest of the calligraphy collection to compare different handwriting styles before finalizing your brand kit.
What are the best font pairings for handwriting styles?
When using a decorative script, the golden rule is to keep your secondary fonts very simple. Because the dancing baseline and calligraphy swashes already carry a lot of visual weight, pairing them with another complex font will make your design look cluttered and hard to read.
Instead, use a clean, widely spaced sans-serif font for your subheadings and body text. A minimalist sans-serif provides a quiet, structured background that allows the romantic script to be the star of the show. Alternatively, a classic, high-contrast serif font can add a touch of traditional editorial elegance to your layout.
Checklist for setting up your design file
Before you send your project to the printer or cut it on your vinyl machine, run through this quick checklist to ensure your text looks perfect:
- Check the tracking: Script fonts should never have their letter spacing increased. Keep the tracking at zero or slightly negative so the connecting strokes touch naturally.
- Test the ligatures: Type out your specific words to see if any default letter connections look awkward, and swap them for alternate glyphs if needed.
- Convert to outlines: If you are sending the file to a commercial printer or a cutting machine, always convert your text to outlines or paths so the design doesn't shift if the recipient doesn't have the font installed.
- Proofread at actual size: Zoom out to 100% to make sure the delicate swashes are still legible and not turning into blurry blobs when printed at a small scale.
 Crafting with Baby Boho Font Style & Projects
 Victory Swing: Retro Design Font Inspiration & Uses
 Crafting Friendly Fonts for Young Readers
 Craft Your Vision with Handmade Fonts
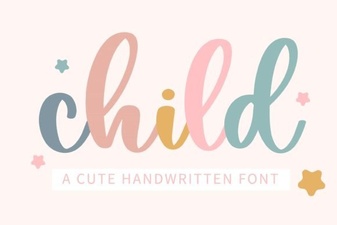 Choosing Child-Friendly Fonts for Creative Projects
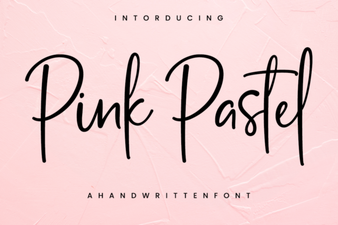 Pastel Font Designs for Elegant & Modern Projects